Showing posts with label Card. Show all posts

Rinea Foiled Paper Feathers & Aztec Card


Hello friends!
 I am over on the Rinea blog today sharing this fun technique 
used to create all sorts of nifty die-cuts made with beautiful foiled papers!
The background was created by stamping Joy Clair's Aztec Background stamps onto a piece of lavender cardstock using VersaMagic inks (chalk ink) and a sentiment from the Butterfly Kisses set.

Check out the following for complete instructions:


Supplies:

Joy Clair - Aztec Background, Butterfly Kisses
Imagine - VersaMagic, VersaFine Clair
Spellbinders - Feather Dies
Cardstock
Xyron Adhesive


More Gnome Fun!

Last week I shared one of my gnome cards using a new set of stamps from Rubber Stamp Tapestry called Fairy Garden.  Well today I have a couple more cards using this set...


This card was stamped on a bit of watercolor paper that I had taped off the edges.  After it was stamped n colored I removed the tape and splattered a bit more of the sky blue over the entire panel.


I had fun with color on this card. I stamped the circles all over the card using various colors of VersaMagic (chalk) ink.  After I had them all stamped I went back and stamped the images inside each circle with VersaFine Clair ink. Finally I stamped little sentiment and added the die-cut "hello".

Hope you all have a lovely week!

Steampunk Magic

Happy Day Friends!

Today I have a bit of Steampunk Magic for you...
the magic of flight!


I just love detailed schematics of various steampunk designs and this is one of my favorites. An airship in the shape of a bird.  If it flew I'm sure it truly was magical to watch. The background is made using Bronze Creative Medium which was applied to the cardstock using a faux wood grain tool. It's amazing how realistic it looks IRL.


Lost Coast Designs is sponsoring the current challenge at Allsorts of Challenges blog - Tags! where you will also find a nifty little coupon if you would like to order.

Image may contain: 3 people, people smiling, text

Doesn't get much easier than that huh?  Just stamp any card and you're set to go!!

Be sure to enter both challenges for your chance to win :)
Good Luck Friends!

Supplies:
Lost Coast Designs - Steampunk Plane, Words
Imagine - Creative Medium, VersaFine Clair
Tag
Cardstock
Faux Wood Grain Tool
Raffia
Brads

A Little Gnome Told Me....

August 1st, 2018!!!

Can you believe it?
I don't know where the year has gone...

It sure doesn't feel like  it should be August already.

Well I thought I'd share the first of a little series of Gnome cards I've made for you all...


A little gnome told me that
Gnome is where the Heart is.

And here are 3 little guys to prove it! 
I had so much fun making this card using stamps from the Fairy Garden set. I started off by stamping the stump from the Budding Spring UM set, from there I stamped the 3 little Gnomes and went on from there. Everything was watercolored after I was satisfied with all of the little mushrooms, critters and such.  This is such a fun stamp set I don't know if I'll be able to wait to show you the other cards I made.


Supplies:

Rubber Stamp Tapestry - Fairy Garden, Whispers from the Garden, Budding Spring 
Imagine - VersaFine Clair
Kuretake Watercolors
Watercolor Paper
Cardstock
MFT - Stitched edge rectangle die


Ocean Babies

Playin' with some new peg stamps today...Ocean Babies!

These little devils are so cute, they make really fun cards...


Having fun mixing up colors with a blue octopus baby, a green lobster, pink whale and orange seahorses which isn't really a stretch since some of them are on the orange side.  I almost never use orange but I really wanted to do something a bit different.  I think it turned out pretty good.


A fun underwater scene.  All of the foliage & coral are different peg stamps just arranged unexpectedly. 


Pairs of babies...the background is a lovely 

Supplies:
Rubber Stamp Tapestry - Ocean Babies, Whispers from the Garden 
Imagine - VersaFine Clair, Memento Dye Inks, VersaMagic (chalk ink), Sheer Shimmer Spritz - Sparkle
Rinea - Turquoise/Turquoise Starstruck Foiled Paper
Sizzix - Sentiment Dies
Cardstock
Twine

Not My Monkey....

The current challenge on the Lost Coast Designs blog is
"No Body Here"
translated...no humans allowed!

I am so excited to share this card with you...
I have been bursting with excitement ever since I made it! 


I stamped the monkey face onto a piece of white cardstock and he was masked over.  I then wrote over and over "That moment you realize this is your circus and these are your monkies." on the background.  I stamped the "Not My Circus" sentiment several times over the writing then removed the mask.  

I then set about coloring him with Prismacolor colored pencils and I extended his hair a bit with the colored pencils just to give him a bit of a frazzled look...how I feel sometimes  - LOL!!  

I have to say I am so pleased with how cool he turned out! 
That look on his face is priceless!  

I hope you'll join us for the
No Body Here Challenge!

Scor-Pal Card - Lemon Friends

It's been a while since I pulled my Scor-Pal out so I decided to use it on a card I made yesterday...


I scored lines on a diagonal every 1/2" one way then flipped it over and scored them the other way. I then stamped images from Rubber Stamp Tapestry's Fresh Lemonade stamp set in the little cells. As I was stamping I kept turning the paper a 1/4 turn so that the images were stamped in various directions.  Helps make it a bit more random and not so static.

The sentiment is from the Whispers from the Garden set.

Supplies:

Rubber Stamp Tapestry - Fresh Lemonade, Whispers from the Garden
Imagine - VersaFine Clair 

Squeeze the Day!

Happy Day Friends!

It's time to squeeze the day ;)  LOL!!


This weeks challenge over at the Just Us Girls Challenge blog is Citrus.
It just so happens that I have a brand new set of stamps from Rubber Stamp Tapestry that fits the bill perfectly... Fresh Lemonade and a sentiment from the set - Whispers from the Garden.


To create the card I started by stamping the flower as a base for each cluster. I then stamped the lemons and limes, filled in with the large leaf bunch. I made a little lemon mask and then stamped the small leaf cluster here and there using the mask over the adjoining lemon/limes. 
Easy peasy, lemon squeezey!  (sorry, couldn't resist!)


What do you think?

Makes me thirsty for a Lemon Shake-Up!  I've been experimenting lately...I made a Strawberry Lemon Shake-Up the other day and it was exquisite!  I'm thinkin' it's time to try a Lemon-Blueberry Shake-Up?!?!

I was having so much citrus fun I decided to make another card....


I started off by tracing an oval onto the card.  I stamped along the left side then added a bit of watercolor along the right side.  After it had dried I stamped the sentiment, trimmed & mounted it toa green card base.

Have a sweet day!


Supplies:

Rubber Stamp Tapestry - Fresh Lemonade, Whispers from the Garden
Imagine - VersaFine Clair Inks
Cardstock
MFT - Banner Dies

B is for Butterfly!

Hello Friends - I have been playing with my Marabu Art Crayons again experimenting with backgrounds. Today I wanted to share the card I made using one of those experiments...  I also made this card for the current challenge over on the Lost Coast Designs/Carmen's Veranda which is... #56 I Spy...Things That Start With "B".

Stamps: Lost Coast Designs - Butterfly Set, Art Wings Sentiment

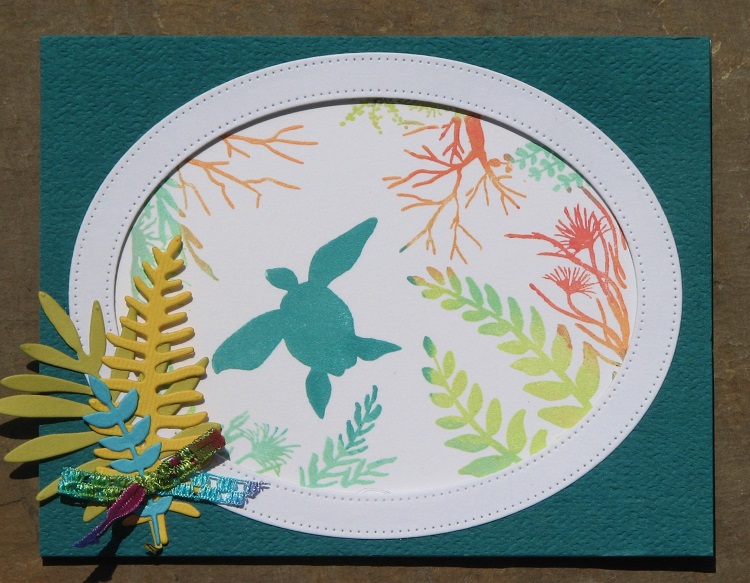
Since I knew I wanted to make a butterfly card I wanted a background that would mimic the light and shadows you see where butterflies play...in among the foliage in the garden. Here's what I did...

I started off with a piece of white cardstock that was a bit larger than the actual size of the card panel I wanted to use.  

I started off by scribbling Sunshine Yellow in scattered areas over the panel. 

Next I came in with Kiwi then Apple (both greens) and finally just a hint of Turquoise.  

As I mentioned I was experimenting so initially I tried to blend it all together with first a sponge dauber then a baby wipe but it just didn't give me the look I was going for - it ended up being just a big green blob.  Into the ??? pile.

So then I started over layering the colors in the same fashion but then I blended the colors gently with my finger tip and it looked pretty good.  

Next I took a crazy net looking stencil and placed it over one corner for a test to see if I could pick up some of the color to give lighter and darker areas.  It worked perfectly so I continued to pick up color in just small areas to create a random pattern rather than the exact stencil image. I was able to pull up some of the greens leaving the lighter green and yellows behind to give the exact look I wanted.


I am so happy with how it turned out...that's what I love about experimenting.  I also have several other "experiments" that I can use on other projects or maybe even a few Artist Trading Coins!

Hope this inspires you to pull out your watercolor crayon medium and give it a go.  And if you're so inclined it would be awesome if you would join in the fun over on the Creative Portal and share your "B" inspired card!


Image may contain: 1 person, text

Challenge #56 - I Spy Things That Start with "B"

Supplies:

Lost Coast Designs - Butterfly Set, Art Wings to Fly
Imagine - VersaFine Clair Nocturne
Marabu - Art Crayons
Stencil
Double Stick Foam Adhesive
Green Card Blank

Watercolor Cotton Card

Hope all of my USA friends had a nice holiday yesterday.  It was a scorcher but we all made it through.

I have been wanting the cotton set of stamps from Altenew since they came out.  Well I finally got them and couldn't wait to play...


We were recently down in Alabama and got to see real cotton in the fields. I was able to purchase a couple stalks of cotton at a flea mall (that's what they call them down there...that's a whole nother story) and they are in a vase on my kitchen table.  I love it...it's so organic, just beautiful.

So I saw that this weeks challenge at  CAS on Friday/Sunday (it's called both for some reason) is #136 Watercolor so I thought I'd give it a go.


The "frame" around part of the cotton was just a swish of water then a bit of color added.  So easy yet very striking don't you think?

Supplies:
Altenew - Cotton Stamps
Watercolor Paper
Imagine - VersaFine Clair - Acorn & Nocturne
Prima - Watercolor Confections
Niji Waterbrush

JFF Challenge - Red White & Blue!

The start of the month always brings lots of fun challenges and this month the challenge for the JFF Blog is Red, White and Blue!  Always a fun theme, especially this time of the year.


And this is the card I created!!
I got special permission to use this card because the eagle is one of the new stamps from JFF Stamps Summer release.  It's not available on their web-site yet but it will be soon.

The red, white and blue banner was created by stamping the stars & stripes image from the Patriotic Block side by side until it was just the right width for the card.  It was then colored using Memento Dual Tip Markers.

Finally I stamped the Home of the Brave sentiment on white cardstock, matted it with black and mounted it to the card.

As it turns out this card will also fit into the Twinkle Twinkle challenge 
over at Cards in Envy challenge this month!


Things That Start with "B"

Happy July Y'all!!  
I hope you're all enjoying full blown Summer now!  

It's the first and you know what that means...a new challenge on the 
Lost Coast Designs/Carmen's Veranda Creative Portal!  
Today's challenge is ~ #56 "Things That Start with "B"".


Hmmmmm - get it ;)  If we're honest with each other, we all feel like this from time to time.  I figured this was the perfect sentiment for this image/challenge - LOL!!

The image was stamped on cardstock using Nocturne VersaFine Clair ink then colored using Prismacolor colored pencils. It is mounted on a bit of Turquoise/Turquoise Starstruck Foiled Paper which was mounted onto a yellow card base.  The card was then wrapped with ribbon, sentiment stamped, matted & mounted on the card using double stick foam tape and I finished it all off with some sparklie sequins.

Now...who to send this to?!?!?!  LOL!!

Wanna join in the fun?
Hop on over to the Lost Coast Design/Carmen's Veranda Creative Portal 
to find out how to play.

Supplies

Lost Coast Designs - Tea Party, Inner Bitch
Prismacolor Colored Pencils

Fun with Flower Cards

Hey, long time huh?  
Did ya think I feel off the face of the Earth?  

Nope, just stampin' away.  Each year about this time Just For Fun Rubber Stamps puts out a new selection of stamps and I have the honor of creating samples for them.  They put on a big stamping show in FL ~ in a couple days as a matter of fact and they like to have their display boards all spiffed up with samples using their newly minted stamps.  I have create 92 cards in 2 weeks time (with a week of vacation in between those 2 weeks).  YES, Ninty-Two!!  I'm pretty impressed with myself and can't wait to start sharing those creations with you but you'll have to wait for just a little while longer.  I can't share until after they get the stamps up on their web-site which will be a couple weeks as they have another show in Raleigh, NC next weekend. 

So in the mean time I needed a few cards to send to some friends and I decided to play with some flower stamps since so many are now blooming. 


I love this card...it's very simple for me but the flowers turned out so cool.
Can you believe the grass is actually a pineapple top!


This was a personal challenge to use orange...it's not a color I use often.


Finally a "me" card...
lots of ink, stamping and some sponging with a bit of messy thrown in - LOL!!
My fingers were very inky after I was done with this one ;)

So what have you all been up to???

Supplies:

Imagine - VersaFine Clair; Memento, Sponge Daubers, On Point Glue
Rubber Stamp Tapestry - all image stamps
Just For Fun Stamps - sentiment stamps
Cardstock
Glitter


Circles Circles Circles!

Welcome, welcome! I am so excited to share my circle card with you today.  The newest challenge over on the Lost Coast Portal is Round and Round.  I thought this circle stamp was PERFECT for the challenge!


I was so excited because I was able to use my new to me Marabu Art Crayons to color it.  I'm sure you've heard me talk about them but I just have to say they are so much fun to play with!

Anyway, to see how easy this card was to create, hop on over the LCD blog and check it out....

Lost In Circles?

Challenge #55 - Round and Round

Image may contain: 1 person

And be sure to join in on the fun and enter your own card into the Round and Round Challenge for your chance to win $'s to the Lost Coast Design / Carmen's Veranda Rubber Stamps! You can't win if you don't enter!

Multi-Color Stamping


Hello Friends!  It's so nice to have fun tools to help you with art and today I wanted to share how I made this card...my multi-colored sea turtle scene.

Directions: 

Trim a piece of white cardstock a bit smaller than an A2 card.  

Place the card panel into a stamp positioner (like a Misti or similar tool).  

Center the stamp on the card panel face down on the panel, close the lid of the positioner and open. Your stamp should now be affixed to the lid.

Ink the turtle portion of the image with desired color then stamp.

Now it's time to have fun. I like using my Memento Dew Drop Ink Pads for this technique as you can add ink in smaller areas than you can with larger pads.  Select desired color of ink and dab it onto portions of the image and stamp.

Repeat with one or more additional colors until the entire image has been stamped on the card.

The results will be a very colorful fun card!
Hope this has inspired you to play a little with your stamp positioner!

Left-Overs Card

Happy Monday Everyone!

I hope you had a spectacular weekend!

If you recall over the weekend I shared the Sunflower & Watermelon Welcome Summer banner with you.  Well I had a few extra pieces left over that I wanted to use up so I created a fun left-overs card!


I chose a piece of Emerald/Emerald Starstruck foiled paper for the background and then layered on all of the extra bits I had left over. I die-cut the "hello" sentiment from a scrap of Ebony/Gold Glossy foiled paper.

Now I have a shimmery, sparklie fun card to share this summer.
Who knew left-overs could be so good!

Supplies:

Rinea Ebony/Gold Glossy Foiled Paper
Rinea Silver/Silver Starstruck Foiled Paper
Rinea Gold/Gold Glossy Foiled Paper
Rinea Ruby/Ruby Starstruck Foiled Paper
Rinea Fuchsia/Fuchsia Starstruck Foiled Paper
Rinea Emerald/Gold Glossy Foiled Paper
Rinea Mocha/Gold Glossy Foiled Paper
Sizzix - Watermelon & Sunflower Dies
My Favorite Things - "hello"
X-cut Banner Die

Tissue Paper Upcycle

Recently I received an art order in the mail and it was wrapped up in a really cute piece of tissue paper.  Well you know me and paper - I couldn't stand the thought of tossing it in the trash so I put it into my stash. 

As it happens I needed a birthday card for my DIL and that tissue paper was just the ticket!


I start by cutting a piece of the tissue paper roughly the size I needed.  To give it a big more character I crumbled it up several times so it was more crinkly.  Next I trimmed a piece of cardstock to 4 x 5.25" and through my Xyron.  I carefully placed the tissue paper over the panel and smoothed it out making sure it was secure.

 Since all of the owls were different I wanted maximum owls, minimum coverage so I stamped the sentiment on a little leaf tag and added some free-hand pen work. The tag was then tied onto the panel using a bit of Prima's navy twine.  The panel was then affixed to a green card blank. 

I am so tickled with how it turned out, those owls are just darling!  I hope she likes it :)

OH, I just got a package with tissue paper that had cute little kitten faces all over it....I see another card in the near future!  

When you get pretty tissue paper do you keep, keep & use or toss???


Little Birdie Hello!

Happy Day Friends!  
I hope you're all having a smashing week!  
Today I wanted to share my little bird card with you....


I created this for the Challenge #53 - Tweet This.  I am just so tickled with how this card turned out...the background was so much fun to make.  To see how I did it, hop on over to the LCD blog....


And there is still time to enter the challenge...


Hope you join in on the fun!  
You might just win $'s for your own LCD & CV stamps!!

Marabu Art Crayons


Hello Friends!  Recently I've been seeing lots of fun new mediums from Marabu and one that particularly caught my eye were their new art crayons. Similar to Gelatos and other water soluble color mediums I couldn't help but wonder if they were different.  Well, recently Joggles* had an amazing sale on them so I snagged 4 different sets of colors. 

*Note - I am not being compensated for posting a link to Joggles...they just have REALLY great sales and I shouldn't be the only one spending my $'s there - LOL!!  ;)  Always happy to help out spending your art $'s too!


So what's the scoop....  First off I have to say that these are the creamy-est sticks I have ever tried! Far smoother than the rest. There is also LOTS of product in this lipstick style tube making them a great bargain.  I will be doing a side-by-side comparison very soon but I just whipped up this card with some goodies laying on my table...


I just scribbled some color onto kraft colored cardstock.


Swished the medium around with a watercolor brush and then stamped over top with VersaFine Clair inks and Joy Clair stamps.  So easy and the colors are so vibrant even on the kraft. I can see these being loads of fun in the near future!

Supplies:

Marabu Art Crayons
Imagine - VersaFine Clair Inks
Joy Clair - Happy 4th
Waterbrush
Kraft Cardstock

Sparkles!

Hello Friends!!

I was sick this past weekend so I missed out on posting a link to a new card/technique that was posted on Saturday over on the Imagine blog. 


I am so excited to share this card with you...it contains one of my favorite craft supplies...GLITTER!!!  Yes I know, most of you think I'm nuts but I love glitter and this is a non-messy way to incorporate it into your projects.  It was mixed with Creative Medium to hold it fast.


It turned out really sparklie and bright IRL, so pretty and since I used glass glitter it also has a really nice texture to it as well.

You can find complete instructions and a supply list over on the Imagine blog here:


Have a lovely day friends!!!