Showing posts with label Gift Ideas. Show all posts

Lavender - Imagine's Color of the Month!

Have you heard that Lavender is the color of the month for Imagine?  It is and I created these fun and smelly sachets!  Smelly in a good way though - filled with lavender collected from my garden.


These little gems were made with the help of Fabrico Dual Tip Fabric Markers.
For complete details be sure to check out the Imagine blog - 


Have a lovely day friends!

Golden Seashell Necklaces....

Happy Day Everyone!

Today I wanted to share my latest creations....
Golden Shell Necklaces!


They were created with this month's color of choice over at Imagine...
Golden Glow.

The inside and out were colored using a mix of All Purpose Inks...gold for the inside of course and a variety of colors out.


They can be worn either with the color showing or the mermaid/octopus out.

For information on how these shells were made, please see ~


Give Something Away Day

Did you know that tomorrow is Give Something Away Day?  It is so I made these fun friendship stones to give-away...  I was inspired by the Kindness Rock movement...artists decorate rocks and leave them places for others to find. I thought I'd place a few around our town square to see if anyone finds them.


You can check out the Imagine blog post - 
for a supply list and instructions.


Faux Beach Glass Votive


Happy Monday! I hope you all had a great weekend.  Today I wanted to share my faux beach glass votive holder made from flattened marbles!   

The color of the month at Imagine is Sea Breeze and the inspiration photo brought to mind the lovely pieces of sea glass that has a subtle frost over the colors....  Well I decided to see if I can't take that inspiration and turn it into a lovely little votive.


If you would like to find out how this votive holder was made, please see the post:


All Geared Up!

My first project of the year... yeah!!  I decided that I was going to get back into projects and alter some of the pieces I've bought over the years.  I don't know about you but when I see a bargain I can't pass it up so needless to say I have LOTS of things in my stash that I want to use.


I decided the first project was going to be something for me! You all know how much I love clocks well as it happens I had a clock kit in my stash.  I was a Walnut Hollow kit that was on clearance at Hobby Lobby a few years back.  (Gotta love Clearance...he's a great guy!)  It was about 1/3rd the regular price!


The kit was how to dry emboss using a plastic template and several different tools (included in the kit).  Well you know me, I don't like to follow directions so I immediately tossed those in the trash and did my own thing ;)


I did figure out why it was so cheap...the glue on the wood piece gave way and popped one of the sides loose.  Luckily the rest of the body was very sturdy so it's just a minor set back.


To help hide the defect I decided to paint the whole thing black...


This not only hides the crack but it will look nice as too!


So I decided that the way they wanted to emboss was WAY too time consuming so I used my fav. cuttlebug embossing fold and embossed a couple pieces of the metal included in the kit.  Please note - the dry embossing technique was very popular many years ago - it was before embossing folders became popular making the technique in the kit pretty much outdated.


I inked the entire panel with Orange Zest StazOn ink,


then went over the high spots with Ganache.


I cut the metal into 1" strips. Poured quite a bit of Aleene's Quick Dry Tacky Glue on the frame which I spread out using my fingers.


I then began laying the strips along the edge - aligning them with the outside edge - the inside edge would be covered by the clock piece so it worked out well this way.


Once the glue dried, I put the clock into the frame...this was no easy task mind you - apparently in addition to the crack, it must have shrunk some too because it was a very tight fit. After the clock was in I trimmed off the excess metal and burnished all of the edges with the paper stump included in the kit.  Finally I glued in the glass piece over the clock and added the battery!  It is now residing on my end-table in the living room.

So, fess up...do you have any kits/projects in your stash that you bought years and years ago???  Please tell me I'm not the only one!

I've been workin;...

nope, not on the railroad but leather gifts for Christmas!  

We're actually going to be working on a few new ventures at our IRL business so I thought I needed to get some practice in before we start working on the "real deal".  I've never worked with leather dyeing, stamping or carving before...just sewing, it was kind of fun and I think I can do this!  We'll see how it all goes!

And here they are...


It started out as just a strip of leather...I did it all!


This was cut and dyed by me, sewn by DH from a piece of 2-3oz leather.


Found this stamp...it's going to be my "mark"
 - looks like an ink stain don't ya think?  LOL!!


So there you go...This is in part what's been taking me away from here...well, that and Christmas stuff ;)  Are you all ready?  I'm about as ready as I am going to get I think...  Still need to clean the house a bit and maybe make some caramels and peanut butter fudge but that's it.   I'm just ready for it to be here - I think I'm worse than the kids - LOL!!  I have an eye twitch just waiting!

Scandinavian Holiday Christmas Decor

Hello Friends!

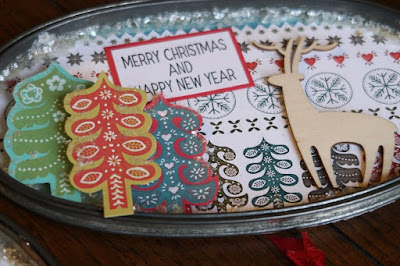
I wanted a change of decor for Christmas so I made a fun set of plaques to hang by our front door using vintage embroidery hoops and the Scandinavian Holiday set from Club Scrap!  Check it out....


They almost look like Christmas ornaments only on a larger scale don't they?  LOL...


Each one was lined with the fun pattern paper that looks to me like a Christmas sweater.


Then I added various embellishments, stamping, sentiments 


and mica flakes.  Gotta have a bit of glitter you know!


Each is very dimensional with several varying layers of fun foam to lift each element off the background.  All three were then tied with a red ribbon for hanging!

These are going on the wall facing the front door so it's the first thing that will greet guests this holiday season!

Merry Christmas Everyone ;)

Supplies:

ClubScrap.com - Scandinavian Holiday Kit, stamps, embellishments
Imagine - VersaFine; VersaMagic
Mica Flakes
Vintage Embroidery Hoops


Still Time To Play

There is still lots of time to play in the 

All you have to do is stamp a card, scrapbook page or other project that fits into one of the themes and post it on your blog then link it with the challenge. 

Here are my creations to help inspire....


No automatic alt text available.


Hope you decide to join in on the fun!!
There is only one entry so far so your chances are pretty good to win the 
JFF Rubber Stamps Gift Certificate!

Crafts with Kids

This week Imagine is celebrating Crafts with Kids. I have missed crafting with my boys but this inspired me to get crafty with Cole - our 2 year old grandson!  We took a day and played with ink...not only were my fingers inky but his were as well.  We had such fun and we created this....


I'm sure he won't remember making this but it's something I'll never forget.


Best of all I have this photo of his little inky fingers.
So precious!

Here is the link to this post....


and be sure to check the Imagine blog all week for more fun crafts with kids!


Club Scrap Blog Hop - Scandinavia!

Welcome to OCTOBER...yes October's Club Scrap Blog Hop.  This month's kit Scandinavia is a modern take on a lovely traditional idea. You may have arrived here from Julie's amazing blog but if not you might want to check her lovely project out.


Is it a book? Is it an album?  Nope...it could be but it isn't...


When you untie the cover and open it up you'll find it packed with 8 cards and envies!
And here they are....


Just too much stampin' fun to be had with the images in this kit!


The next stop on the hop is:


You can find the complete hop list here:


Supply List:

Club Scrap - Scandinavia Cardstock, Pattern Paper, Ribbon, Stamps, Embellishments, Cut-Aparts
Imagine - VersaMagic Chalk Inks; VersaFine; Memento Dye Inks