Showing posts with label JFF Stamps. Show all posts

JFF Challenge - Red White & Blue!

The start of the month always brings lots of fun challenges and this month the challenge for the JFF Blog is Red, White and Blue!  Always a fun theme, especially this time of the year.


And this is the card I created!!
I got special permission to use this card because the eagle is one of the new stamps from JFF Stamps Summer release.  It's not available on their web-site yet but it will be soon.

The red, white and blue banner was created by stamping the stars & stripes image from the Patriotic Block side by side until it was just the right width for the card.  It was then colored using Memento Dual Tip Markers.

Finally I stamped the Home of the Brave sentiment on white cardstock, matted it with black and mounted it to the card.

As it turns out this card will also fit into the Twinkle Twinkle challenge 
over at Cards in Envy challenge this month!


Fun with Flower Cards

Hey, long time huh?  
Did ya think I feel off the face of the Earth?  

Nope, just stampin' away.  Each year about this time Just For Fun Rubber Stamps puts out a new selection of stamps and I have the honor of creating samples for them.  They put on a big stamping show in FL ~ in a couple days as a matter of fact and they like to have their display boards all spiffed up with samples using their newly minted stamps.  I have create 92 cards in 2 weeks time (with a week of vacation in between those 2 weeks).  YES, Ninty-Two!!  I'm pretty impressed with myself and can't wait to start sharing those creations with you but you'll have to wait for just a little while longer.  I can't share until after they get the stamps up on their web-site which will be a couple weeks as they have another show in Raleigh, NC next weekend. 

So in the mean time I needed a few cards to send to some friends and I decided to play with some flower stamps since so many are now blooming. 


I love this card...it's very simple for me but the flowers turned out so cool.
Can you believe the grass is actually a pineapple top!


This was a personal challenge to use orange...it's not a color I use often.


Finally a "me" card...
lots of ink, stamping and some sponging with a bit of messy thrown in - LOL!!
My fingers were very inky after I was done with this one ;)

So what have you all been up to???

Supplies:

Imagine - VersaFine Clair; Memento, Sponge Daubers, On Point Glue
Rubber Stamp Tapestry - all image stamps
Just For Fun Stamps - sentiment stamps
Cardstock
Glitter


CSI Case File No. 256

Hello Friends! 

This month the Imagine Artist Team is joining up with CSI Challenge blog to share a bit of inspiration. I was assigned case file #256 to try to solve the case (shown below) and this is what I came up with...


I was so excited about this as I had the perfect stamps to go with "The Scene" and since we like to travel so I thought the inspiration was the perfect way to celebrate how we "camp" on road trips!  You see, our idea of camping is the Holiday Inn, Marriott, Hampton Inn and Suites, etc.  The photos are from a trip earlier this year when we had to stop in Harrisburg/Hershey area during a pop up snowstorm. We lucked out and got the last room available at Spring Hill Suites and it was beautiful to boot!   


My inspiration from Case File No. 256 was "The Scene", Colors, Banners and more.  


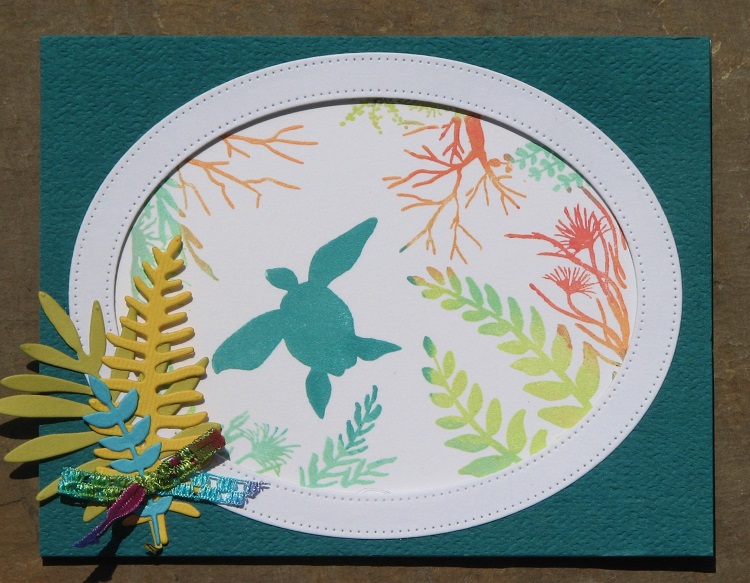
These stamps from Just For Fun Stamps went with the theme perfectly!!


And I had this Club Scrap "Road Trip" stamp that worked out so well...
I also used a map and travel sign stamps to create various background pieces as well...


Hope this inspires you to pull out your stamps, inks and photos to scrap your travels.

Supplies:
Imagine - VersaFine Clair - Nocturne, Cheerful, Tulip Red, Warm Breeze; Memento Dual Tip Markers
MFT - Banner Die
Just For Fun Rubber Stamps - Camper 1, Camper 2, Wash Tree, Campfire
Club Scrap - Vintage Travel Stamps, Washi Tape, Cardstock


Multi-Color Stamping


Hello Friends!  It's so nice to have fun tools to help you with art and today I wanted to share how I made this card...my multi-colored sea turtle scene.

Directions: 

Trim a piece of white cardstock a bit smaller than an A2 card.  

Place the card panel into a stamp positioner (like a Misti or similar tool).  

Center the stamp on the card panel face down on the panel, close the lid of the positioner and open. Your stamp should now be affixed to the lid.

Ink the turtle portion of the image with desired color then stamp.

Now it's time to have fun. I like using my Memento Dew Drop Ink Pads for this technique as you can add ink in smaller areas than you can with larger pads.  Select desired color of ink and dab it onto portions of the image and stamp.

Repeat with one or more additional colors until the entire image has been stamped on the card.

The results will be a very colorful fun card!
Hope this has inspired you to play a little with your stamp positioner!

DecoArt Paint Pouring on Cardstock

Welcome back my inky friends!!  If you recall on Monday I shared my experiments with DecoArts new Pouring Medium on a variety of canvases.  You know I can't stand to waste anything especially paint and ink so rather than toss the baby wipe (from the swipe canvas) and extra paint leftover I pulled the painty wipe across a piece of white cardstock just to see what would happen.  I am happy to say it worked perfectly!!  It makes an incredible surface to work with...check it out ~


These are the first two cards I've made using part of the painted cardstock. I absolutely LOVE how they turned out!! Due to the paint/pouring medium properties you need to use an ink that dries on slick surfaces such as StazOn or VersaFine Clair which is what I used for these examples. I stamped several different images on each card incorporating complimentary colors to the original swipe. Then mounted on card blanks and added a sentiment to each. 


This is the original swipe piece of cardstock...
and my cards...


If you look closely you can pick out where each panel came from on the original.  


For some reason these panels just reminded me of hay fields so I went with wildflower silhouettes for both. I added some interesting textures and other stamps in the background just to take your eyes on a tour of the whole panel.  

What do you think?  Next time I pull out the paints I am going to try to pour right onto my cardstock.  I know it will cause a bit of wrinkling due to the moisture content in the paint/pouring medium but I think I can get it to lay flat after it's dry to use.  These panels were fairly flat after it had dried completely so I'm not worried about that aspect at all.

Supplies:
DecoArt-
Pouring Medium
Pouring Top Coat
Media Fluid Acrylics - Primary Yellow, Primary Cyan, Yellow Green Light, Cobalt Teal Hue
Americana Acrylic Paint - Titanium White
Other - 
White Cardstock
Just For Fun Rubber Stamps - All Stamp Images


Birthday Bunnies

Hello all my inky friends!  I hope you've been doing well recently. I know I've been a bit MIA lately...I've been strolling down memory lane.  I rescued a bunch of old family photos and paper memorabilia from a dumpster.  Yes I've been dumpster diving - well technically Bob (youngest son) did the diving (thanks Bob!), I did the sorting - LOL!!   I can't wait to share some of it with you...it brought back so many memories as well as surprises as I hadn't seen most of the photos and none of the other ephemera.

Anyway, today I took a bit of a break to make a card for a friend!  She recently turned 50 and is having a celebration over on her blog - Crafty Nomad - a Bunny Hop - lol...  She loves bunnies and is featurning bunny art on several of her posts. She invited everyone to help her play along by posting a bunny card of our own creation so I thought I'd join in the fun.  Here is the card I made her....


To make the card I sprinkled a tiny bit of Nuance pigment powder onto my craft mat...one blue, turquoise and a lime green color.  Remember, just a teeny tiny bit - a little goes a long way when using it for monoprinting.  I then misted the powder with water and pounced several white card panels on the resulting colorful mix.  I then let them all dry.

Next I stamped the bunnies onto one of the panels, colored with Prismacolor Colored Pencils and used an Inktense watercolor pencil to create the grass.  Finally I stamped the sentiment then mounted it onto a blue card blank.


A close up of the bunnies...
I tried to give them each their own personality. 
This was so much fun I may have to make another bunny card!


Supplies:

Nuance Pigment Powders
Imagine - VersaFine Clair Ink - Nocturne; Craft Mat
Prismacolor Colored Pencils
Inktense Watercolor Pencils
Just For Fun Stamps - Bunnies & Sentiment
Cardstock
Adhesive

Keep on Swimmin'

Happy Friday!!!

Today I have a fun card for you which will hopefully help usher in the warmer weather and if not the sentiment will come in handy to help keep us going until it does show up - LOL!!


Three little fishies and their hopeful optimism!


Stop by the Imagine blog to see a complete supply list and instructions for making this card.


Spring Flowers Challenge

Hello Friends!

I hope you're having a good day today. 
I wanted to share the new April challenge over on 

I wanted to share a few...o.k. several flower cards with you...


Hope you stop by and give it a try!

Supplies:

Just For Fun Rubber Stamps - all images n sentiments
Imagine - Memento Dye Inks, Memento Dual Tip Markers, VersaMark, Clear Embossing Powder, On Point Glue, irREISTible Pico Embellisher, Sponge Daubers
Kuretake Watercolor Paints 
Niji Watercolor Brush

Easter Bunny Plaque

Hello Friends!  I wanted to make a little plaque for Easter and I had this darling Marshmallow Bunny stamp from Just For Fun Rubber Stamps!


Here's how I made it....


I started off by cutting the basic plaque shape from a piece of chipboard.


Inked it up a bit and stamped the sentiment on the top.


Next I sponged Radiant Neon ink on cards,


Stamped the image with VersaFine Clair Nocturne (Black)


Embossed and cut them out.


I knew I wanted a bit of grass for the bunnies to hide in so I cut up some paper grass that I then glued to a strip of foam board.


Added bunnies to the card with double stick foam tape, 


Trimmed up the grass 


Added it to the plaque and finished it off with a few flowers and paper twine.


Ready to greet guests!

Supplies:

Imagine: Radiant Neon Ink - Electric Blue, Electric Yellow, Electric Purple, Electric Green, Electric Pink; VersaFine Clair - Nocturne, Acorn; Memento - Rich Cocoa; Embossing Powder; irRESISTible Pico Embellisher - Wedding Dress; Tear It! Tape; On Point Glue
Just For Fun Rubber Stamps - Marshmallow Bunnies
Prima Marketing - Flowers
Chipboard, Foam Board, Double Stick Foam Tape, Paper Twine; Easter Grass

I.C.W.M. Under Way!

Yes, in case you didn't see my post near the end of last month I found out not too long ago that February is International Correspondence Writing Month! I decided to take up the challenge and have started writing little notes and cards, sending them off across the country and globe. I am hoping that some of them will start arriving at their destinations soon and that they will spread a little joy.  If you'd like to receive a bit of happy mail, please e-mail me your addy.  I'd be happy to drop you a line :)

Between the writing and work things have been a bit backed up here but I'm going to try to catch up a bit.

First I wanted to share the new challenge on the Just For Fun Rubber Stamps blog this month.  We're featuring silhouette images!  There are so many fun silhouette stamps out there that you're sure to have at least one in your stash.  If you're feeling up to it, stamp up a card with your favorite silhouette and share it here - JFF Feb Challenge - Silhouettes.  We'd be happy to have you!

To get you started here are a few cards I made for the challenge....


Now it's your turn!

40% off Just For Fun Rubber Stamps !!!

Just For Fun

40% Off Special Offer-2018

We hope everyone had a great  Holiday Season 
and we wish you all a very Happy, Healthy and Prosperous 2018!

Just For Fun is kicking off 2018 with a 40% OFF Special Offer!  It will start Januray 8 and run through January 15. All online retail orders will receive 40% OFF and your savings will be shown in red at check out. To get your savings go to  www.jffstamps.com 

Thank you for all your support in 2017!
Just For Fun

Blue Purple n Silver!

Hello friends...I wanted to share a few cards I made for the newest challenge over on the JFF Stamps blog....Blue, Purple and Silver!


My first card was made by stamping the trees in the background with Paris Dusk Memento Ink which I sponged a few different colors of blue and purple inks over the entire panel.  Once everything had dried I stamped and embossed the stag with VersaMark & White EP.  I wanted to add a bit of zing so I framed it with a really fun sparklie washi tape.


My next card was made by stamping and embossing the snowflake image that had been previously colored using Color Burst pigment powders.  Don't ya just love the pretty effects they create?


Finally a but card with a bit of stamped & embossed snowflakes and watercolor over top.  Can you see a snowy theme going on here?  I guess the weather is guiding my art right now - LOL!!

If you have some time and inky desire...please feel free to join in on the fun...

Image may contain: text

Supplies:
JFF - All Stamps
Imagine: Memento Dye Inks; VersaMark; Embossing Powder - White, Clear, Sparkle; Sponge Daubers
Color Burst
Club Scrap - Cardstock, Ribbon
Washi Tape
MFT Dies


Winter Wonderland ...

No, we didn't get any snow last night but I did make a fun winter wonderland scene on a card for Imagine!  One of the challenges for December was "winter window" so I decided to make a winter shadow box card.  It's not the normal small cards you see around.  This one measures 4x7x2.5" and fits into a #10 size envelope. Since it's 2.5" wide it allows for 4 layers plus the scene on the back of the card. Lots of room to decorate!


You can find the directions on how I completed this card here...


Don't ya just love how the White Amplify! really looks like snow on the hills and trees?  It really adds such depth and dimension to an already fun card.

So, are you ready for winter????


Still Time To Play

There is still lots of time to play in the 

All you have to do is stamp a card, scrapbook page or other project that fits into one of the themes and post it on your blog then link it with the challenge. 

Here are my creations to help inspire....


No automatic alt text available.


Hope you decide to join in on the fun!!
There is only one entry so far so your chances are pretty good to win the 
JFF Rubber Stamps Gift Certificate!