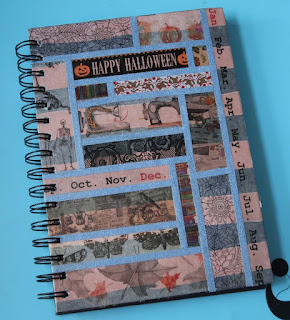
The other day while I was at Wal-Mart I noticed some neat little notebooks that were a great price. I bought a couple and knew I was going to personalize them a bit. Now, I have to admit, I have loads of washi tape, some of which I haven't had the chance to use yet so I decided I was going to choose my favorites and put them to use!
Here's how it turned out....
I decorated both the outside and inside of the covers.
So this is what one of the notebooks looked like - nice O-ring binding (just like the Bind-It-All bindings) so I already knew it would be easy to take it apart and get it back together.
So the first thing I did was gently pull apart the wire binding and removed the front and back covers.
Next I set about taping all of the washi tape down.
I used my craft knife to trim the edges.
Once I had the image washi tape in place I went back over it with sparklie blue washi for a bit of bling. The entire piece was the covered in a layer of Sparkle Creative Medium to seal it all in place because you know how some tapes have a tendency to curl up off the paper.
I then added some printed cardstock on the inside of the page and repeated the whole process with the back cover.
Once both pages had dried I set about cutting tape/paper away from the holes. Easy enough to do with my craft knife. After I had finished opening up all the holes I slid the pages back on the wire, use the Bind-It-All to close the wires back up again!
While it was a bit time consuming it was well worth it don't ya think?
I'll bet nobody else has a notebook like this :)


